


Several years ago, my sister and I received a fun fishing game for Christmas. This was during the mid part of the 1960s – prior to much attention being placed on the safety of children and their games. This particular game had magnetized fish that “swam” along an electrified board. Each fish had a metal loop for a mouth and each fishing pole had a metal hook at the end of a long wire. Regardless of the significant electrical shocks that we received, we did have a good time playing this game.
A few weeks ago, I saw a post on a social media site that showed a homemade version of this game. Plush fish were used. Each fish had a magnetic mouth and each pole had a magnet attached to the line to attract and “catch” each fish. I couldn’t find a pattern associated with this new hand created version. After searching several sites that did provide sewing, crochet and knitting patterns of various fish, and not finding a fish style that suited my aesthetics, I decided to create my own pattern.
This pattern was created to make this fishing game for my granddaughter. Of course, the usual disclaimers would be in place. This pattern uses magnets, poking devices and small parts, so the finished product is not be suitable for animals, small children and some adults who tend to put things in their mouths.
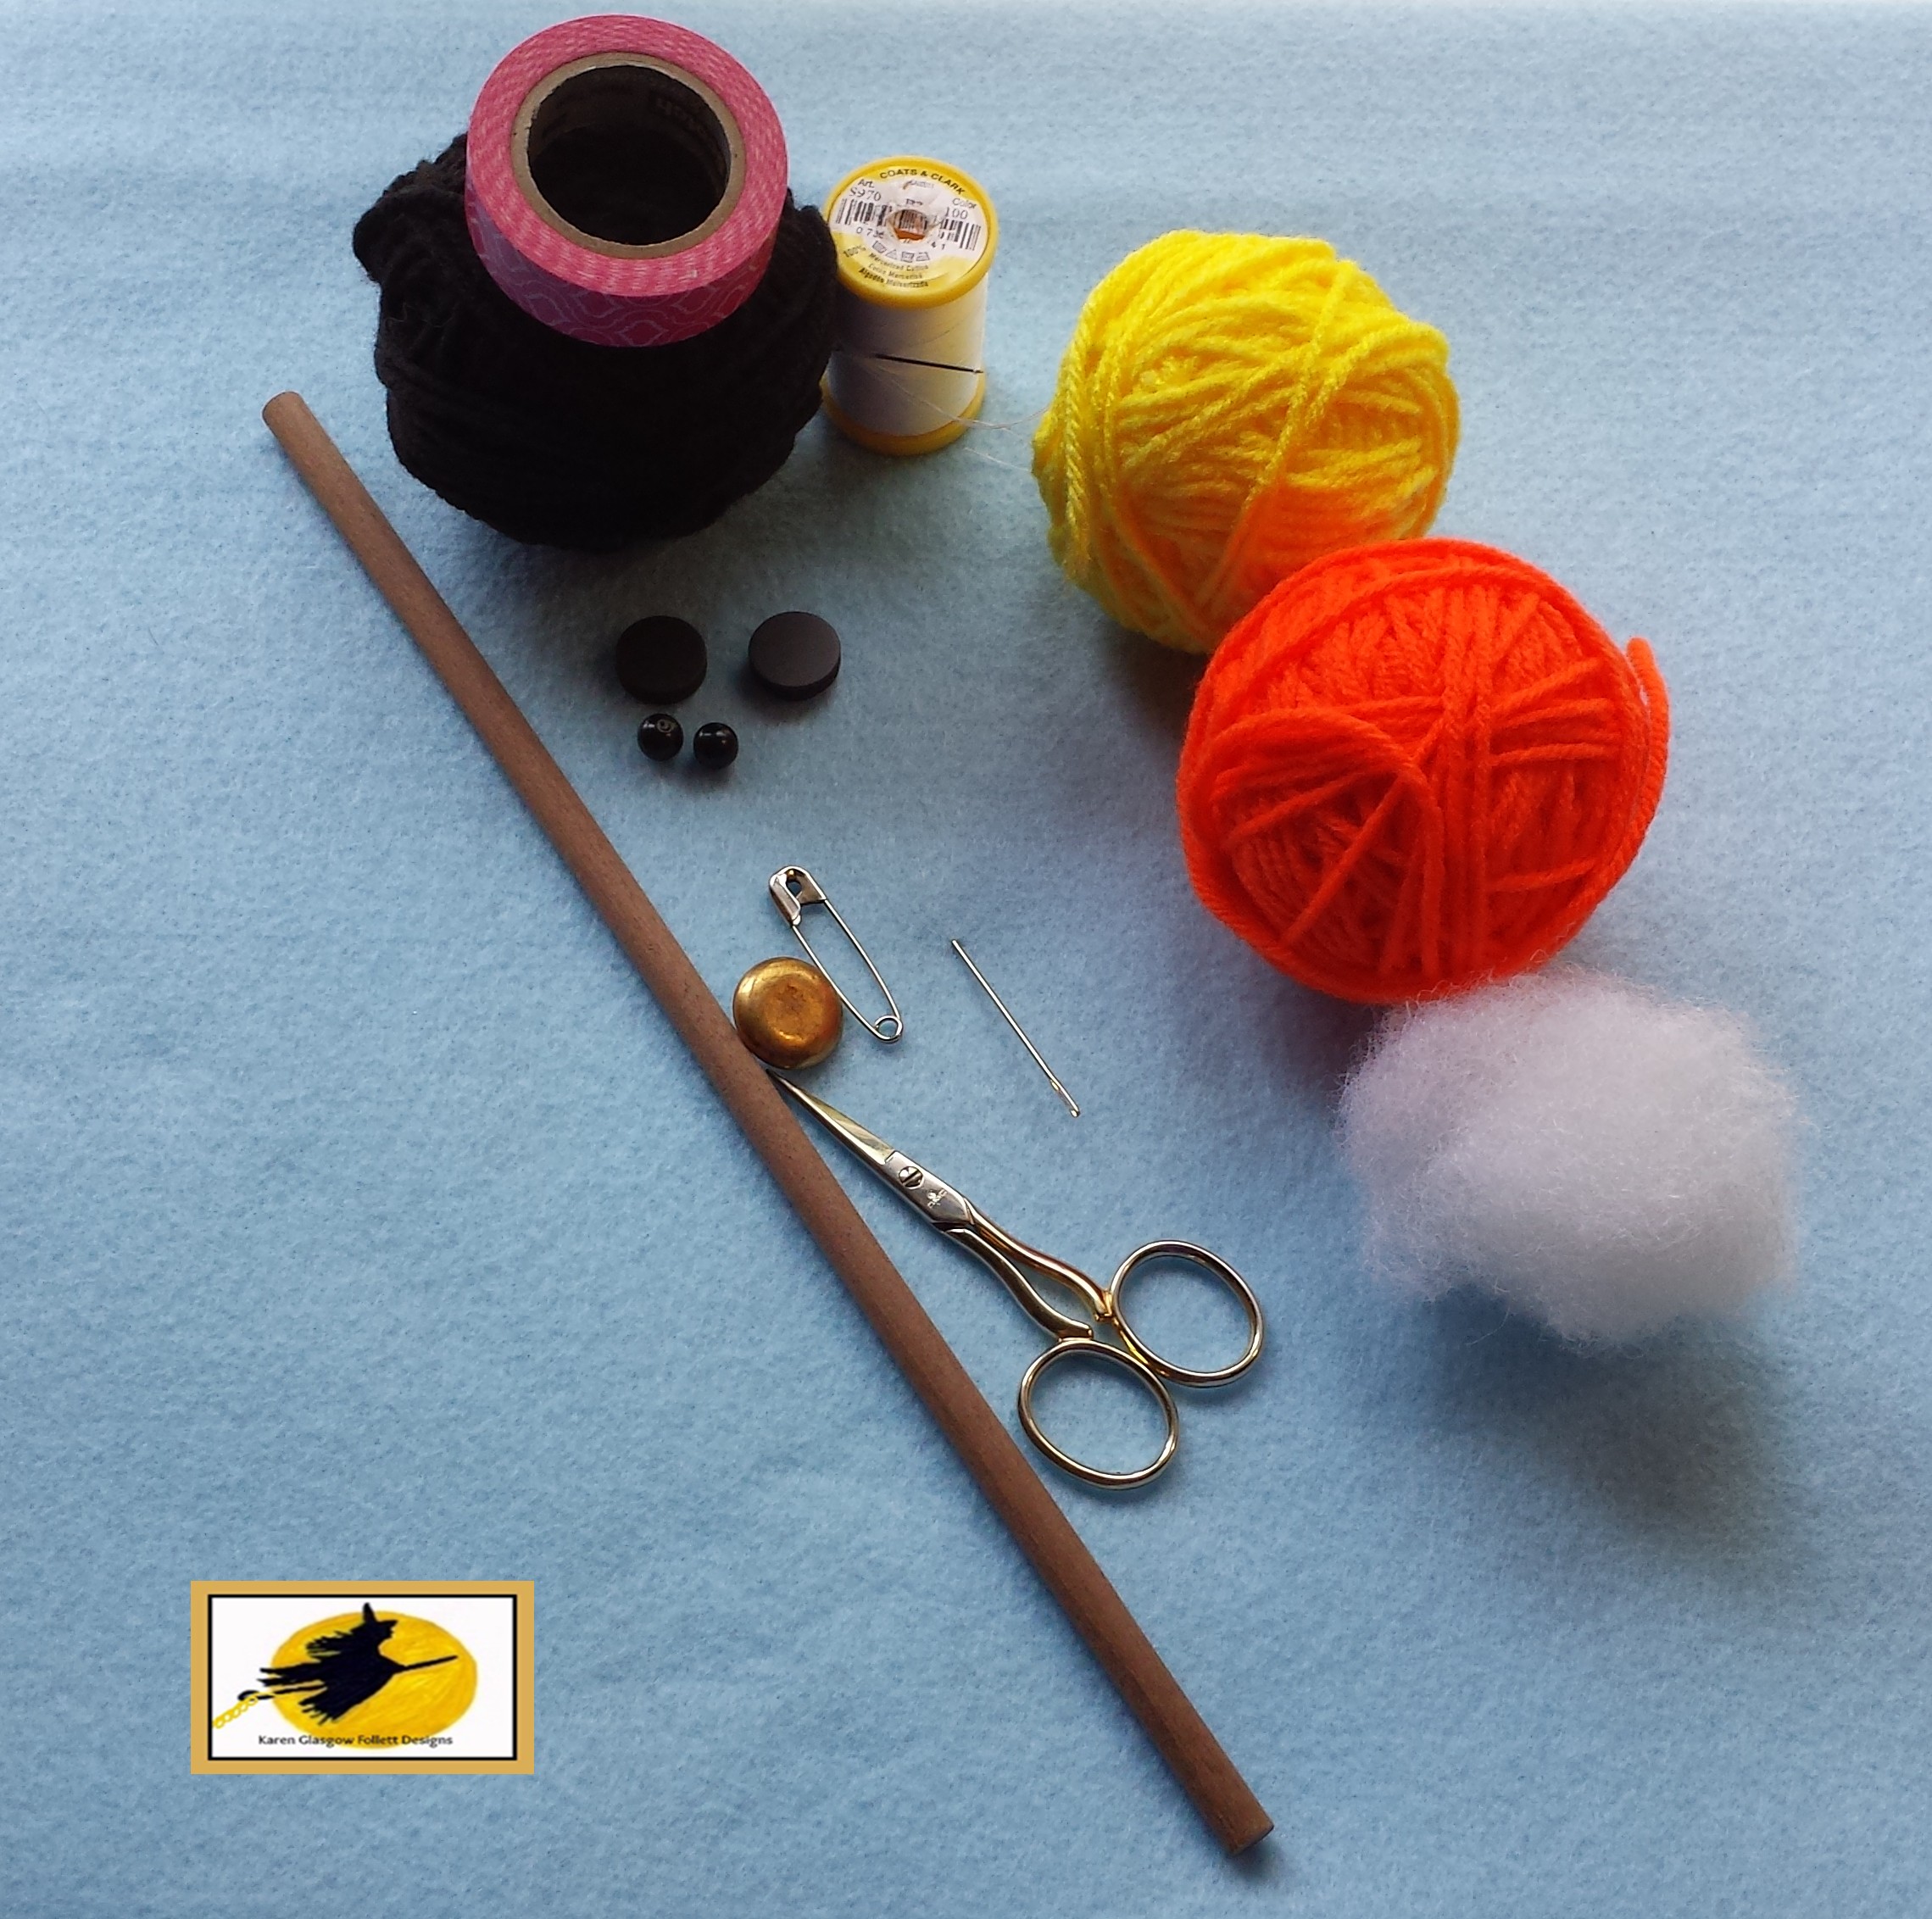
You will need the following supplies;
- Yarn in both fish color and fin color, I used a 4ply ww yarn. You could adjust this to make your fish smaller or larger. This is a great stash buster as each fish doesn’t require much yarn. One skein will yield an entire school of fish
- “E” or 3.5 mm crochet hook
- stitch marker
- fiber fill
- 6mm beads for eyes
- Sewing thread and needle
- tapestry or other large eye needle
- Dowel
- Plain Shank Button
- Tape
- Strong Disk magnets
- Glue
- Scissors
Fish Crochet pattern
Special notes;
Unless directed, do not join rounds. You may want to place a stitch marker (safety pin, ect) into the first stitch of each round to keep your place.
Unless directed, each stitch of the fish body is worked in the back loop only (this is the top of the stitch loop that is furthest away from you) You will be later attaching fins to some of the unused loops and the remaining unused loops give a “scale” quality to your fish.
Stitches Used
- Chain – Ch
- Single Crochet – sc
- Slip stitch – Sl st
- Double Triple Crochet – dtr
- Triple Crochet – tr
- Double Crochet – dc
- Single Crochet Decrease – sc dec
- Half double crochet – hdc
Create a magic circle or Ch 2,
Round 1, Work 6 sc in the magic circle (or in the 2nd ch from the hook) 6
Round 2, *Work 2 sc in next sc, work 1 sc in next sc* Repeat from * to * around (9)
Round 3, Work 2 sc in each sc around. (18)
Round 4, *Work 2 sc in next sc, 1 sc in next 2 sc* Repeat from * to * around (24)
Round 5, Work a sc in each sc around (24)
Rounds 6 – 8, Repeat Round 5 (24)
Round 9, *Work sc in next 2 sc, sc dec through next 2 sc* Repeat from * to * around. (18)
Rounds 10 & 11, Work a sc in each sc around (18)
Round 12, *Work sc in next sc, sc dec through next 2 sc* Repeat from * to * around (12)
Rounds 13 & 14, Work a sc in each sc around (12)
At the end of round 14, cut and secure yarn. Turn fish body inside out, so the unused loops are showing on the outside of the fish body.
Stuff fish as desired with fiber fill.
Align the 12 stitches of round 14 so that each stitch lays against its opposite stitch. (ie 12 is across from 1, 11 is across from 2, ect) See picture

Tail
With yarn color designated for the tail, insert your hook into both aligned stitches, stitch fish body closed with a sc in each stitch couple. (6 sc)
Ch 5, work a dtr and a tr in the 1st sc, Work a dc and a hdc in the next sc, Work a sc in the next 2 sc, Work a hdc and a dc in the next sc, and a tr and a dtr in the last sc, Ch 5, sl st chain to same last sc. Cut and secure yarn,
Dorsal Fin
With fish facing you and tail fin vertical; locate the unused loops of round 6. “Eye” a straight line between the tail and the fish front. You will be working the unused loops on either side of that line together in rounds 6, 7 and 8. Working in this manner provides a centered a more secure attachment for the dorsal fin. See picture

With yarn designated for dorsal fin, *insert hook into first unused loop, yarn over, and draw back through, Insert hook into unused loop of adjacent stitch, yarn over and draw back through loop, Yarn over and draw back trough all loops on hook.* Ch 1, Repeat from * to * in the unused loops of round 7, ch 2, Repeat from * to * round 8.
Ch 4, Work 2 dc in the same stitch worked in round 8’s unused loops, Work dc in next ch 1 space, Work hdc in the next stitch worked in round 7’s unused loops, Work a sc in the next ch 1 space, Work a sl st in the stitch worked in round 6’s unused loops. If desired, work another sl st around the post of the round 6 sc directly in front of the dorsal fin. Cut and secure yarn.
Side fins.
You will work one side with the fish face facing you and the other side with the tail facing you.
Again, locating the unused loops of round 6, count down 6 loops from the dorsal fin. With fin color yarn, insert hook into that unused loop and attach yarn with a sl st. ch 1, and sc into the same loop, Working toward the dorsal fin, work 2 dc, ch3, 2 dc in the next unused loop, sc, ch1 and sl st in the next unused loop. Cut and secure yarn. Repeat this sequence on the opposite side of the fish for the other fin.
Optional fish lips
If you are wanting plush fish and no magnet, you can create lips for your fish.
Locate the unused loops of the 1st round, Insert hook into one of the loops and attach yarn with a sl st. *Work ch 1 and sl st in the next loop* Repeat from * to * around. Ch 1, and join to beginning sl st. Cut and secure yarn.
With tapestry needle (or other large eye needle) bury all yarn ends into the fiber fill.
Attach beads to create the fish eyes, bury the thread ends in the fiber fill.
Magnets
Make sure that you are using the attracting sides of the magnets. Glue one magnet to fish face. Glue the other magnet to the shank button. Allow both ample drying time.
Fishing Pole
Attach yarn or other “line” to pole and secure with tape. Thread other end through the shank of the button.
Now you are set for a fun fishing experience!
Karen Glasgow Follett 2015
